
The power of using a node graph is that the instructor can create a flow of questions and answers in a non-linear way. This way, when a student answers A instead of B, the follow-up questions may lead to a whole different mix of questions and scenarios. And all this, simply by connecting nodes into different paths.
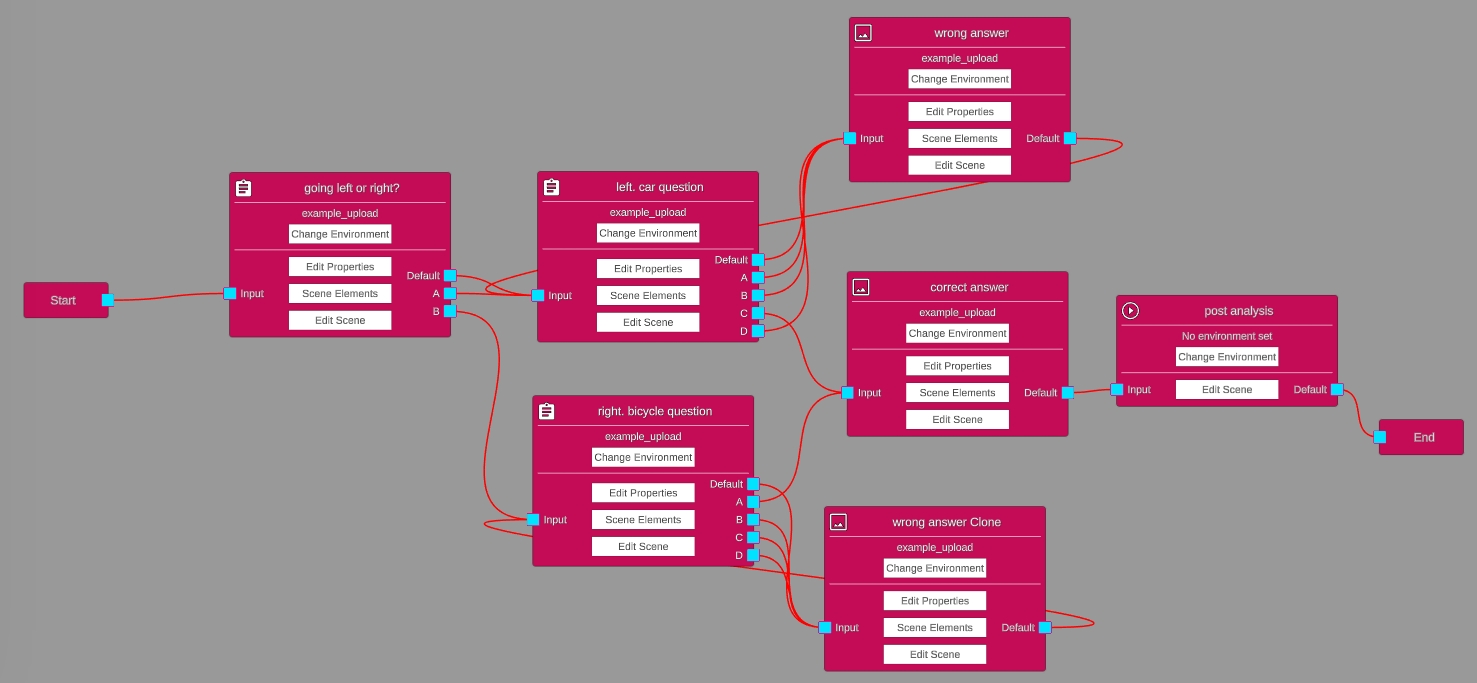
Nodes have input connectors and output connectors. Each output connector can only have one connection line as output. However a node can receive multiple output connections from other nodes on its input connector. See in the example picture underneath how quickly a course can become a myriad of connection lines.
Scenario Questions are a special kind of node to control the flow of non-linear courses with their answer options. Every answer image that is added to a SQ will add an extra output connector to the node. These appear als alphabetised output connectors. These scenarios allow for branching, looping or skipping questions.
The possibilities all depend on how the instructor wants the course to be structured, but here are a few general flow control tips:
– Avoid making spaghetti out of the connection lines. If a lot of looping or node jumping happens in a course, the node graph can become quite complex and difficult to understand and maintain. Consider whether nodes can be positioned differently or the course structure can be better subdivided to keep the node graph under control.
– Loops are possible. So in case of repeating parts of the course, the output connector of that node can be connected to a node used much earlier in the course to go back.
– You can also create loops with a Scenario Question node itself by connecting one or more of its own output connectors to its own input connector. This can be useful for e.g. a try again until the student picks the correct answer.
– Duplicate nodes when a question is similar to one you already created earlier, so you do not have to redo e.g. the selection of the right background environment and setting the starting position, possibly even scene elements can be reused when the background is the same, etc, etc … all in all, this can save a lot of time.
– Don’t forget the end node and use multiple if you want.
– When as an instructor you are designing a course, know that every time you save the course, it is updated on the server. So, you can almost instantly check how your progress looks in the app itself on the VR headset. Just save the course and reload it in the app on the VR headset and see whether the starting point is correct, whether the scene elements are in the right place, etc. Make sure you added an bogey student used by the instructor(s) and an instructors role in the CMS.
